Easy Shark Face Paint: Step-by-Step Shark Design for Beginners
Bijgewerkt op: 22 jun
Want to learn easy shark face painting? In this step-by-step guide, you'll discover how to create a cool shark that looks like it's swimming across the face — perfect for beginners.
Shark face painting is a popular sea animal face paint design for children who love adventure, ocean creatures, and bold face paint looks. With a recognizable shark shape, sharp teeth, and strong lines, you can quickly create an impressive design that is especially popular with boys, but also loved by many girls. This makes shark face painting a great choice for birthday parties, beach parties, and under-the-sea themed events.
Although this design looks impressive, it is surprisingly easy to create. With a few basic colors and simple brush techniques, you can quickly paint a recognizable shark that appears to swim across the face. This makes it suitable for both beginners and experienced face painters looking for fun sea animal face paint ideas.
Are you looking for shark face paint ideas, sea animal face paint, ocean face paint, or do you want to learn how to paint an easy shark without complicated techniques? In this blog, you'll learn exactly which materials you need and how to build this design step by step.
What You Need for Shark Face Painting
You only need a few basic supplies for this shark face paint design:
1. Grey Face Paint
For the shark.

2. Red Face Paint
For the mouth.

3. White Face Paint
For the teeth and highlights

4. Black Face Paint
For the outline and details.

5. Brushes (2 Sizes)
Thin brush for details
Slightly thicker brush for larger shapes

Step-by-Step Shark Face Paint
Below you'll see step by step how to create a cool shark face paint design. This design is quick, eye-catching, and perfect for beginners.
Step 1: Shark Outline
Using grey face paint, create the basic outline of the shark.

Step 2: Fill the Shark
Fill in the shark using grey face paint.

Step 3: Fins
Make back, dorsal en tail fins.

Step 4: Mouth
Paint the inside of the shark's mouth using red face paint.

Step 5: Teeth
Add sharp white teeth to the mouth.
💡 Tip: Make the teeth slightly different sizes for a more natural look.

Step 6: Details
Use black face paint to add the eye, gills, and other details.

Step 7: Outline
Outline the shark with black face paint to make the design stand out.
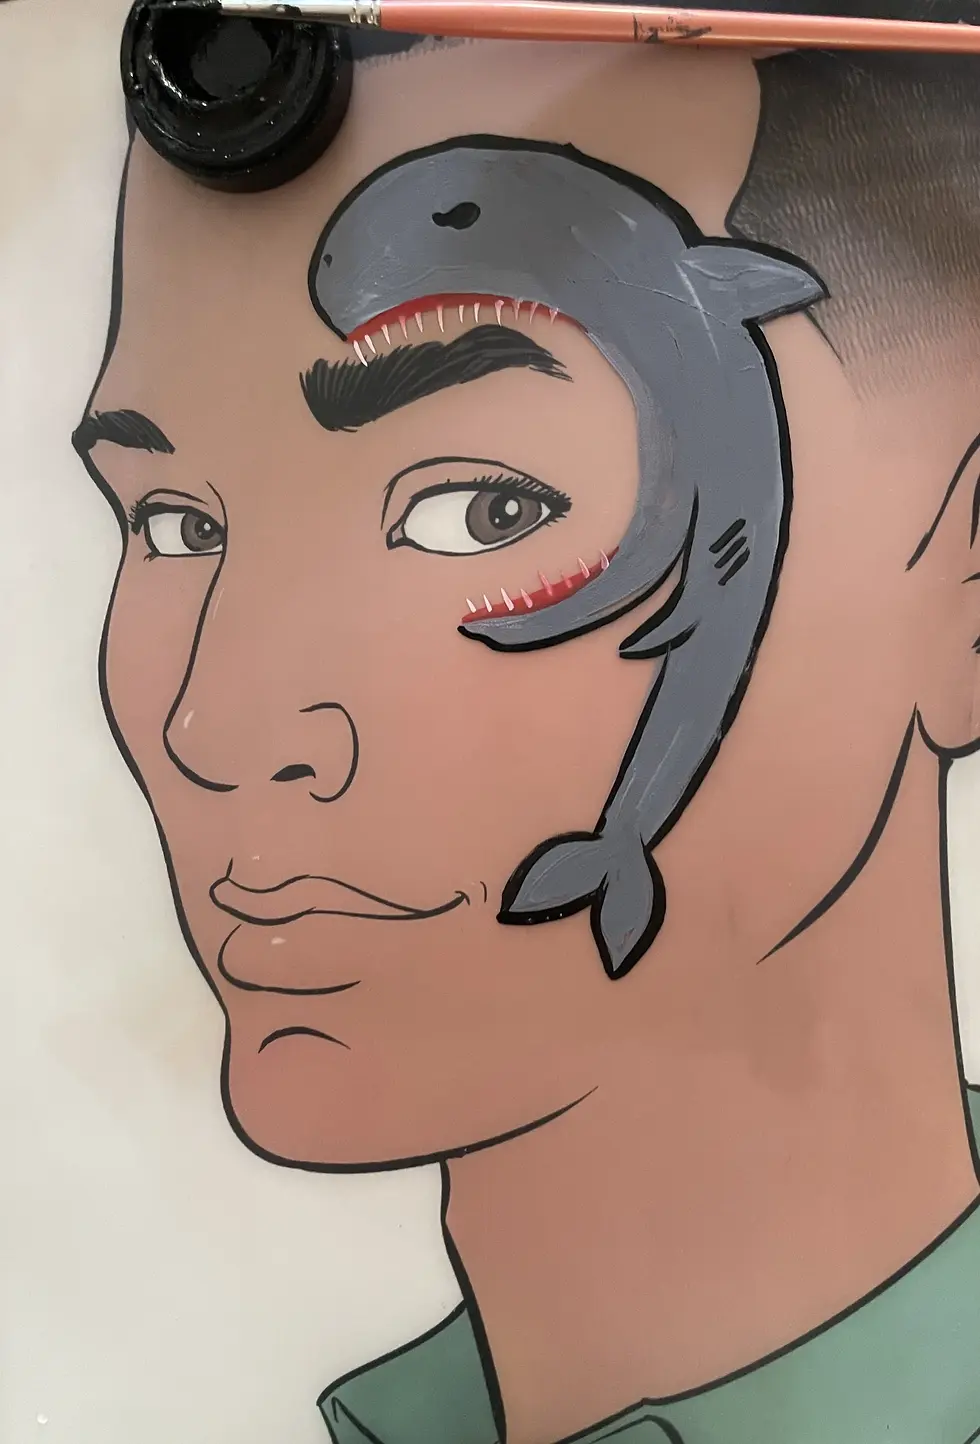
👉 Do you notice that clean lines are difficult? Many beginners struggle with this, especially when painting animals. With a few simple brush techniques, it quickly becomes much easier.
Step 8: Highlights
Use white face paint to add highlights to the shark.
💡 Tip: Highlights give the shark more depth and make it look more realistic.

Common Mistakes When Painting a Shark
Watch out for these beginner mistakes:
Making the shark too small → less recognizable
Making the mouth too small → less impressive
Not using enough contrast between grey and white → flat appearance
Adding too many details → messy result
✔ Large shapes and strong contrast make all the difference.
Variations of Shark Face Painting
Want to change it up?
Cartoon shark face paint
Glitter shark face paint
Hammerhead shark face paint
Baby Shark face paint
👉 Perfect for birthday parties, sea life themes, and beach parties.
When to Use This Design
Shark face painting is perfect for:
Birthday parties
Sea animal themed parties
Beach parties
Festivals
Themed events
👉 Bold, eye-catching, and always popular with children.
Ready to Paint Your Own Shark?
With these steps, you can already create a cool and recognizable shark. With practice, your lines will become cleaner and you'll work faster.
But do you notice that:
your lines aren't clean
your shark isn't easily recognizable
or it takes longer than you'd like
That's completely normal.
👉 In Mia's Magic's face painting course, you'll learn step by step:
how to create clean lines
how to work faster
and how to build popular animal designs
So you can face paint with confidence — even if you're still a beginner.